


This week I thought I would mix it up a bit and throw together a top shooter tutorial. I got a lot of positive feedback on last week’s photo tutorial so I’m sticking to it this week with a new one for a braided top shooting string. This shooter was introduced to me by the one and only Jeff Brunelle, and what I love about it is that the braided top shooter plays a lot like a dropped top string.
The braided nylons are tighter than your average single nylon shooter. The tightness of the nylons, if done right, can help cut the release point on your pocket. Like this top shooter, I am going to keep this tutorial short and sweet, but I will say that the braided nylons generate quite a bit of nylony twang. If you like the feeling of the ball hitting the nylon I suggest you give this a try. If not, check in next week for another edition of Top String Tuesday.
Step 1: The braided top shooter requires two nylons. I went with orange and blue to help make the stringing easier to see (and let’s be honest, they look good together). The strings should each be about an arms length – I went end of my hand to the middle of my chest.

Step 2: Fold your first nylon in half and stick both ends of the nylon through a sidewall hole near the top of the head. I went third from the top because I knew I wanted to string a lower pocket with a quick release.
Step 3: Weave the two ends of the nylon like you would a typical woven shooting string – over and under, over and under – across the stick.

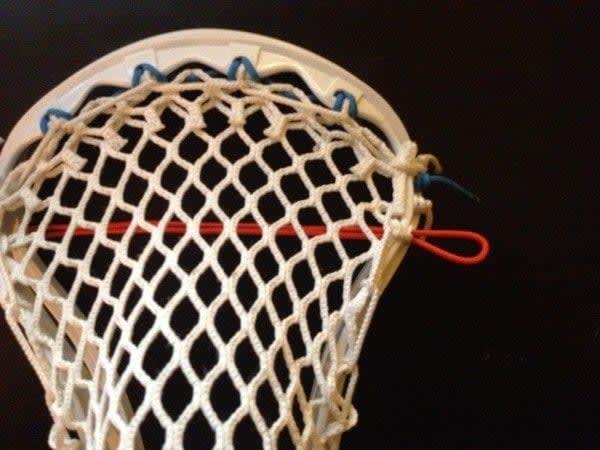
Make sure that the loop, created by sticking the two ends of the folded nylon, does not get pulled through the head. Also, be sure that your nylon does not get twisted. The end that started on top needs to stay on top, the one on the bottom stays on the bottoms, just like mine in the picture above.
Step 4: Fold your second nylon in half and wrap it around the ends of the first.

Step 5: Weave your second nylon (my blue nylon), this time weaving around the outside of the first nylon (my orange nylon) and then through the inside of the first nylon, outside and then inside, across the stick.


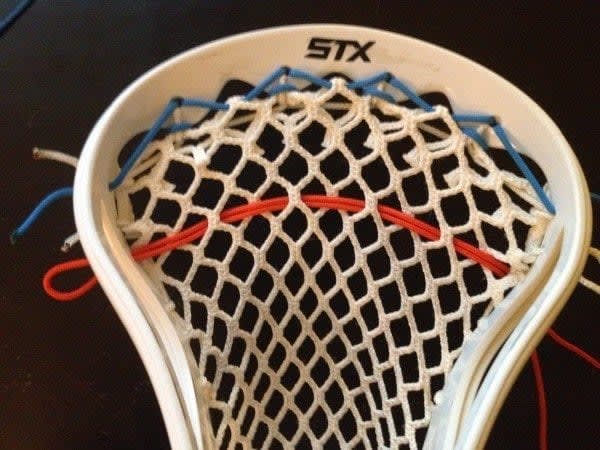
Step 6: Continue weaving across the head.

Step 7: Stick the ends of both folded nylons through the loops that were created initially (this should already be done for the ends of your first nylon).


Step 8: Tie a looped knot on both sides using the two ends of each nylon. It is important here that your nylons are pulled tight. When the nylons are pulled tight the loop created by the fold in the nylon will be too small for the knot you are about to tie to pull through.


Step 9: Ball so hard.